knacksnews
How to Turn an Image into an STL for the Best Stereolithograph in 3D Printing
In the world of 3D printing, turning an image into a 3D model that can be printed is a fascinating aspect of the technology. Whether you're a hobbyist or professional, converting an image into an STL file—especially for creating a high-quality stereolithograph—offers endless possibilities. The STL format is widely used in 3D printing, and having the correct image converted to this format is crucial for successful prints.
This article will guide you through the process of transforming an image into an STL file, providing tips to achieve the best quality results for your 3D printing projects. From the basics of image conversion to advanced techniques, we've got you covered.
Understanding STL Files and Stereolithography
Before we get to the steps for converting an image to an STL file, let's understand what an STL file is and why it's so important in 3D printing. STL is an abbreviation for Stereolithography, a file type that specifies the 3D shape of an object without any color, texture, or material details. It's a triangulated mesh format, i.e., it dissolves 3D geometry into a stack of very small triangles that a 3D printer can read to build the object layer upon layer.
A majority of 3D printers commonly support the STL file, so it is the popular choice for 3D printing. This is why the STL file you generate from an image must be as accurate, detailed, and print-optimized as possible. You are, in effect, converting a 2D representation to a 3D object when you convert an image into an STL file. Whether it's for a model, design, or prototype, getting the best stereolithograph guarantees your print will be high-quality, accurate, and detailed.
Step-by-Step Guide to Turning an Image into an STL File
Turning an image into an STL file is a detailed process, but with the right tools and techniques, anyone can do it. Below is a step-by-step guide to help you through the process:
Choose the Right Image
The first step in turning an image into an STL file is selecting the right image. For best results, a high-contrast image, such as a logo, silhouette, or simple graphic, is ideal. Complex images with intricate details might be harder to convert and may not give the desired outcome. It's also crucial that the image is in black and white or has a high contrast between the elements you want to convert and the background.
Use a Vector Graphic Tool
Once you've selected the image, the next step is to convert it into a format that 3D modeling software can use. This is where vector graphic tools like Adobe Illustrator or Inkscape come into play. Using a vector graphic editor, you can trace the image and create clean, sharp lines that will later be converted into 3D geometry.
Convert to a 3D Model.
Once you have your vector graphic, the next step is to import it into a 3D modeling software. Programs like Tinkercad, Blender, or Fusion 360 are great for beginners and professionals alike. These tools allow you to extrude the 2D shapes into 3D objects. The extruding process essentially lifts your image off the page, creating depth and turning your 2D graphic into a 3D model.
In some cases, you might want to add depth or detail to your design to give it more dimension. The more detail you add, the more accurate your 3D print will be. Keep in mind that complex designs with a lot of detail might require more refinement to achieve a clean, print-ready STL file.
Export as STL
After finalizing your 3D model, the next step is to export it as an STL file. Most 3D modeling software will have an export option for STL files. It's important to ensure the file is optimized for printing—checking things like mesh integrity and file size is essential before proceeding.
Prepare the STL for 3D Printing.
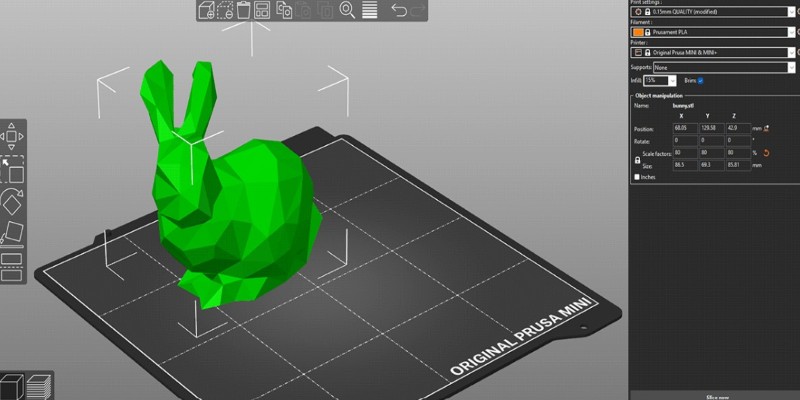
Before you send the STL file to your 3D printer, it's important to prepare it using slicing software. A slicer, such as Cura or PrusaSlicer, will take your STL file and convert it into layers that the printer can use to build the object. This software also lets you make adjustments to the print settings, such as layer height, speed, and supports, ensuring that your print comes out exactly as you envision.
Tips for Achieving the Best Stereolithograph for 3D Printing
Turning an image into an STL file is just the first step in creating a successful 3D print. To get the best possible stereolithograph for 3D printing, there are a few tips to keep in mind:
Pay Attention to Resolution: High-resolution images ensure clarity in the 3D model. Low-resolution images can result in blurry or pixelated models, affecting print quality. Always use clear, high-quality images for the best results.
Simplify the Design: While adding intricate details is tempting, keep designs simple to avoid printing issues. Complex models with small features may lead to failures. Start with basic shapes and add complexity gradually.
Test and Refine: Before finalizing, test printing your STL file is essential. This helps identify flaws and areas needing improvement. Based on the results, refine the model to ensure a more successful print with each test.
Conclusion
Turning an image into an STL file for 3D printing opens up countless creative possibilities. By following the steps of selecting the right image, converting it to a 3D model, and exporting it as an optimized STL file, you can create high-quality prints. With attention to resolution, simplicity in design, and careful testing, you'll ensure your 3D prints are precise and detailed. Mastering this process will enhance your 3D printing projects, providing endless opportunities for innovation and creation.
On this page
Understanding STL Files and Stereolithography Step-by-Step Guide to Turning an Image into an STL File Choose the Right Image Use a Vector Graphic Tool Convert to a 3D Model. Export as STL Prepare the STL for 3D Printing. Tips for Achieving the Best Stereolithograph for 3D Printing ConclusionRelated Articles
How to Effectively Convert ARW to JPG: 3 Methods You Need to Know
Unlocking Serial Communication: Free Tools for Debugging

Understanding CMMS: What It Is, Its Uses, and Essential Software Tips
How to Easily Print Contracts with ezeep Blue: A Complete Guide

How to Use Tags and Labels to Organize Your Files: A Step-by-Step Guide
Top 5 Online Services to Convert WMV to MP4 Without Hassle

How to Use Scheduling Assistant in Outlook: A Step-by-Step Guide

How to Personalize and Scale Your SMS Marketing with EZ Texting
From SVG to PNG: The Ultimate Guide for Converting 2D Graphics into Digital Images

How to Detect AI-Generated Text and Photos in a World of Digital Deception

How to Add New Google Calendar Events to Notion: A Step-by-Step Guide