knacksnews
Merging iPhoto Libraries on Mac: Easy Methods to Keep Your Photos Safe
Managing multiple iPhoto libraries on a Mac can quickly become a hassle, especially if you have been using iPhoto for years. Duplicate libraries, scattered photos, and the constant need to switch between libraries can make organization frustrating. If you have ever wondered how to merge iPhoto libraries on Mac without losing your images or metadata, you're not alone.
Fortunately, Apple has mechanisms to merge your libraries without compromising your memories. Whether you're using Apple's Photos app or third-party applications such as iPhoto Library Manager, it can be simple. This tutorial will guide you through all you need to know about merging iPhoto libraries so that you won't lose cherished photos along the way.
Why Merge iPhoto Libraries?
Before proceeding, it's essential to realize why combining iPhoto libraries is required. As time has passed, users tend to create different libraries because of disk space problems, backup reasons, or forgetting the location of their pictures. Consequently, pictures are distributed over various locations, and organization becomes a problem.
Combining libraries helps you keep all your photos in one place, making them simpler to locate and organize. It also removes duplicates, freeing up storage space on your Mac. Another important reason is Apple's shift from iPhoto to the Photos app, which could necessitate combining libraries to ensure your photos remain accessible.
How to Merge iPhoto Libraries on Mac?
There are two primary methods of combining iPhoto libraries: Apple's native Photos app or a third-party utility such as iPhoto Library Manager. Although the Photos app provides a simple approach, third-party utilities give you greater control, the ability to sift through duplicates, and the preservation of metadata.
Method 1: Merging iPhoto Libraries Using the Photos App
Apple Photos replaced iPhoto, and you can use it to import more than one library into a single collection. This is how you can do that:
Open the Photos App: If you have your photos stored in iPhoto, you'll first need to migrate them to the Photos app. Open Photos and let it scan your libraries.
Import Additional Libraries: Go to “File” and select “Import.” Choose the iPhoto libraries you want to merge, and Photos will begin importing them into your primary library.
Wait for Processing: Depending on the number of photos, this process might take some time. Photos will analyze duplicates, but they may not catch everything.
Organize Your Library: Once the import is complete, you can create albums, manually remove duplicates, and categorize your images.
This method is straightforward but lacks customization options. If you have multiple large libraries and want better control over duplicates, a third-party tool might be a better option.
Method 2: Using iPhoto Library Manager for Better Results
iPhoto Library Manager was designed specifically to merge iPhoto libraries. It offers more advanced options than the Photos app, ensuring minimal data loss.
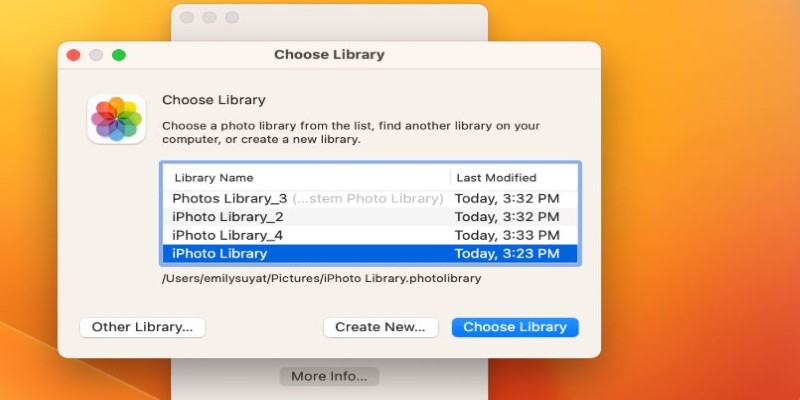
Download and Install iPhoto Library Manager: Install the software on your Mac and open it.
Add Your Libraries: Click “Add Library” and select all the iPhoto libraries you want to merge.
Choose a Destination Library: Select where you want the merged photos to be saved.
Merge Libraries: The tool will compare your photos, identify duplicates, and merge them into a single collection while keeping metadata intact.
Verify and Clean Up: Once the process is complete, browse through the new library to ensure all photos are properly organized.
iPhoto Library Manager provides more flexibility and ensures better results than Apple’s built-in method. It’s particularly useful if you have multiple libraries with duplicate photos.
How to Handle Duplicates While Merging?
One of the biggest challenges when merging iPhoto libraries on Mac is handling duplicate images. While both the Photos app and iPhoto Library Manager attempt to detect duplicates, their accuracy varies, so additional steps may be needed.
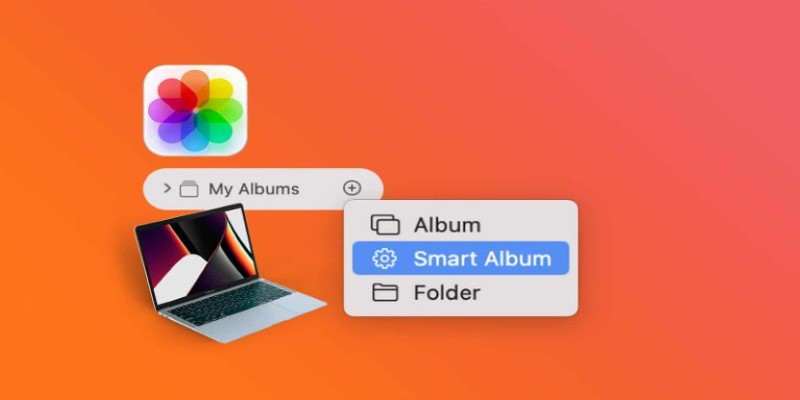
A useful method is creating Smart Albums in the Photos app, which automatically detects duplicate images for easy removal. If using iPhoto Library Manager, enable its built-in duplicate detection feature to ensure only one copy of each photo is merged.
Even after using these tools, it’s wise to manually review your library. Some duplicates may slip through, so scanning your collection after merging can help remove unnecessary files. Taking the time to clean up duplicates will free up storage space and keep your library well-organized. By following these steps, you can maintain a streamlined photo collection without clutter.
What to Do After Merging iPhoto Libraries?
Once you have merged your iPhoto libraries, it’s essential to ensure everything is properly set up. The first step is to create a backup of your new library. Use Time Machine or an external drive to save a copy before making any changes. This precaution protects your photos from accidental loss or technical issues during the merging process.
Next, take time to organize your photos. Sorting images into albums, removing duplicates, and renaming files will make navigation easier. A well-structured library ensures that you can quickly find specific photos without sorting through clutter.
Finally, check for missing images. Sometimes, not all photos transfer correctly during the merge. Compare your new library with the original ones to ensure everything is intact. If you find any missing pictures, retrieve them manually from the old libraries.
By following these steps, you can transition smoothly to a single, well-organized photo collection, making it easier to access and enjoy your memories.
Conclusion
Merging iPhoto libraries on Mac is an essential step for organizing your photos and reclaiming storage space. Whether you use the Photos app or a dedicated tool like iPhoto Library Manager, consolidating your libraries will make managing your pictures easier. While Apple’s built-in method is simple, third-party tools provide more control over duplicates and metadata. By following the steps outlined in this guide, you can merge your iPhoto libraries efficiently without losing any precious memories. After merging, be sure to back up your new library and organize it for easy access. With a single, streamlined photo collection, you’ll never have to search multiple libraries for your favorite pictures again.
Related Articles

The 11 Best CRMs for Small Business: Streamline Your Workflow in 2025

How CoverDoc Uses AI to Revolutionize Cover Letter Writing for Job Seekers

Understanding CMMS: What It Is, Its Uses, and Essential Software Tips
Effortless Ways to Extract a Freeze Frame from a Live Photo

From SVG to PNG: The Ultimate Guide for Converting 2D Graphics into Digital Images

Which Are The Best Note-Taking Apps for Windows: Top Picks for 2025

From ZIP to JPG – Your Go-To Guide for Quick Image Extraction

Transform Your Photos into Artistic Sketches with the Best Sketch Editor

How to Turn an Image into an STL for the Best Stereolithograph in 3D Printing

How to Convert JPG to TIFF on Your Desktop: A Simple Guide

How to Use Tags and Labels to Organize Your Files: A Step-by-Step Guide